

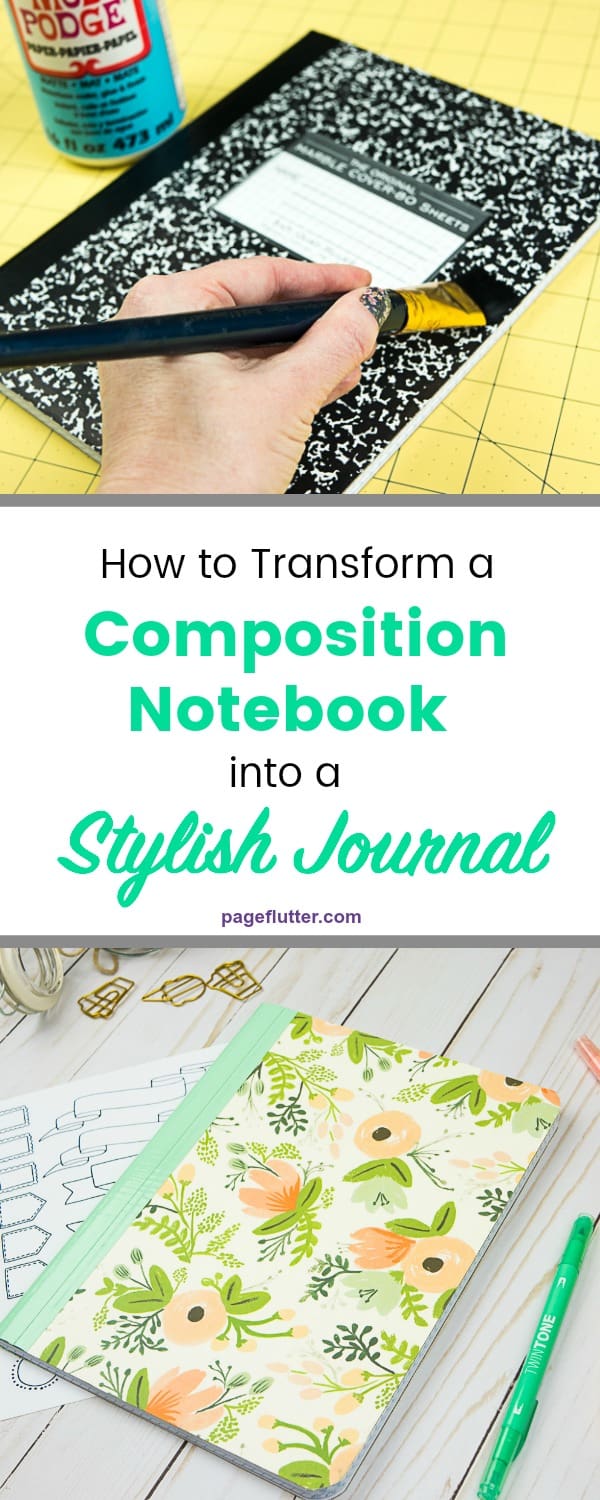
How To Add Journal With One Book Elastic
This post and the photos inside it contain chapter links. If y'all purchase something through the link, I may receive a small committee at no extra charge to you. See my total disclosures HERE.
A DIY journal tin be super fashionable! Plus, it's a cracking option when a fancy designer periodical isn't in the upkeep. I'll testify you how to completely transform an ordinary composition notebook with supplies you probably already have!
I've had this post on the back burner from a couple of months, and I'm and so excited that I can finally share it with you today! 1 of the most exciting times in my journaling routine is breaking into a brand new notebook. I continue a stash of loftier-quality notebooks and journals around so I'm ever prepared to start a new one when the need strikes. But what if y'all're brand new to journaling? Or on a tight budget? Investing in those designer notebooks tin exist intimidating. You might not want to driblet a pile of cash right now, especially if you're not sure journaling is your jam!
Today, I'm going to show you how to transform a tiresome limerick notebook into a stylish DIY journal yous can utilise for planning, Bullet Journaling, studying, doodling, daily journaling, scrapbooking, creative writing, or anything else that strikes your fancy!
How to Turn a Limerick Notebook into a Stylish DIY Journal
I have a soft spot for those all-too-familiar black marble composition notebooks. Non merely tin can you notice them everywhere, but they're the quintessential blank slate for making a DIY journal. You tin can customize everything from the cover to the alphabetize, or even add pockets to the covers. They're also lightweight, inexpensive, B5 sized (which is comfortable for writing) and the paper gets a wonderful crinkly quality later it's been used for a while. There just something about these notebooks I love!
Today, I'll bear witness you how to encompass 1 of these bad boys then that it reflects your personality. I've likewise noticed this process adds a bit of strength to the comprehend.

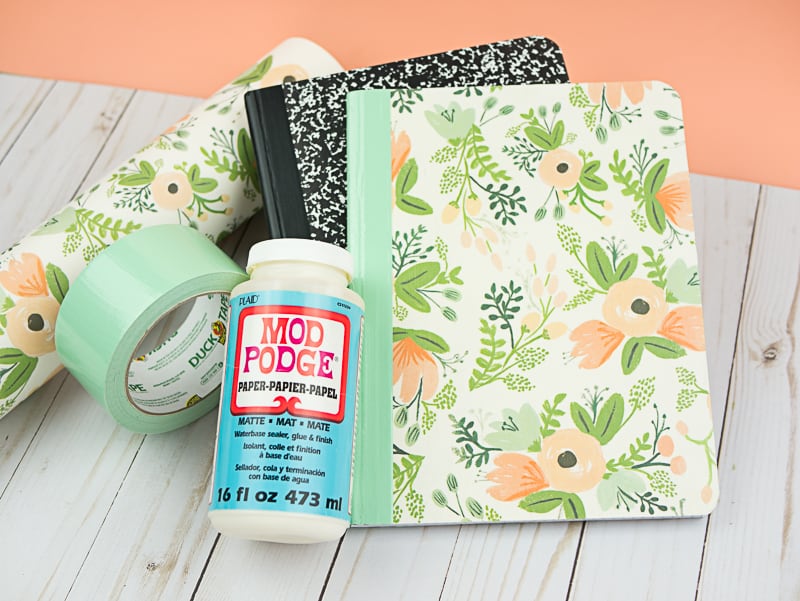
Materials Needed
These are the materials I used, but they definitely aren't the only options. Starting time with what y'all have on hand, and then switch things upwardly with new materials or color combinations.
- Composition notebook: The lined versions are everywhere! You can unremarkably notice them in stores for less than a cadet. I prefer filigree or dot ruled newspaper for my journaling (Of course! It would be too easy otherwise, right?). Since grid composition notebooks are surprisingly difficult to find in my area, I ordered a 4-pack of filigree-ruled notebooks by Roaring Spring. I go on them handy for those times I demand a good basic notebook.
- Mod Podge: I used the paper craft formula considering I had it on mitt. I probably would have preferred matte gel medium, as my base adhesive. I still would use the Mod Podge at the end to seal the notebook. Information technology dries completely clear and has a wonderful matte finish!
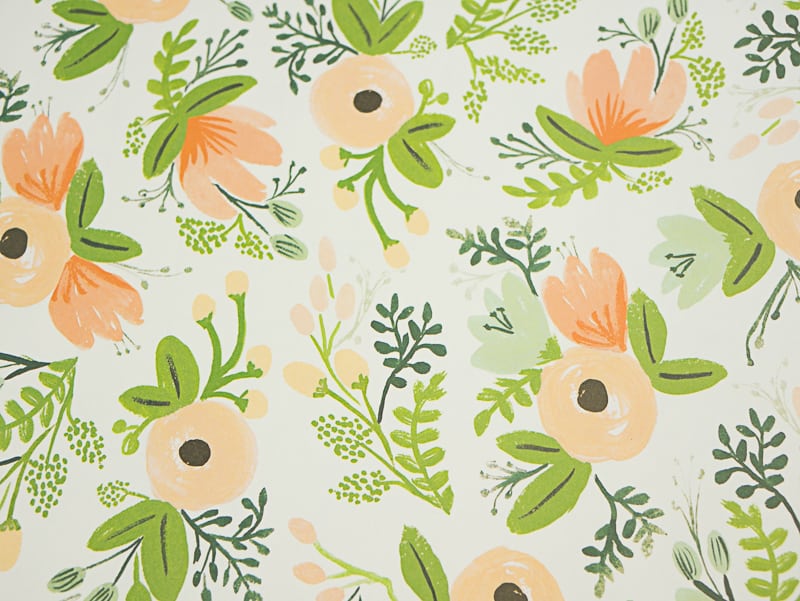
- Scrapbooking paper or gift wrap: I'm using Rifle Paper Co. gift wrap. I adore their designs, and I had a huge stash from a auction they ran a few months back.
- Printer paper (if your decorative paper isn't thick enough to hibernate the marble blueprint)
- Colored duct tape: I had mint green Duck Tape that looked neat with my souvenir wrap.
- A flat paintbrush: Use ane y'all don't care about ruining. Call up, yous'll exist dipping information technology in gum!
- A sponge brush
- Scissors
- A precipitous craft knife
- A cutting mat or board: I used my big Fiskars sewing mat, but y'all tin can also use a pocket-size ane designed for paper crafts.
How to Make a Stylish DIY Journal
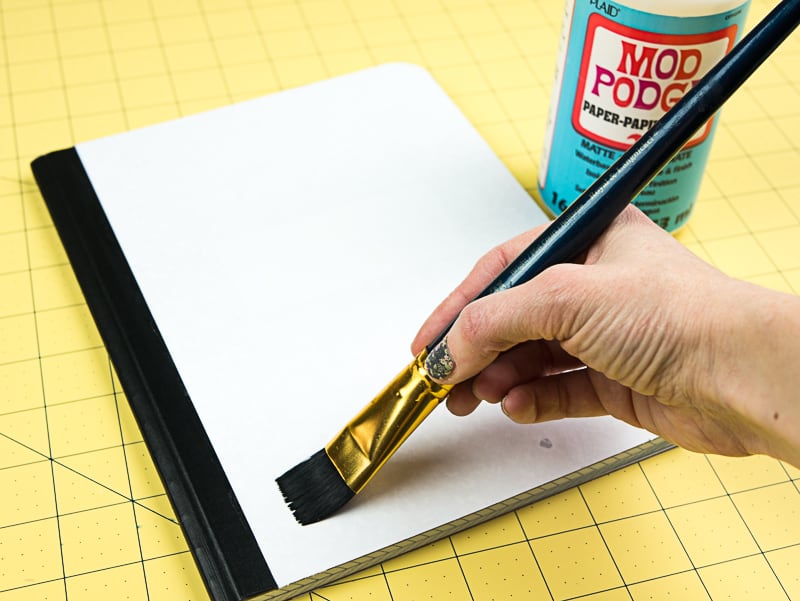
Step 1:Start by covering the composition book with a thin layer of Modern Podge, matte gel medium, or adhesive of your choice. Yous need to work quickly and then the glue doesn't dry before the next stride. Pay special attending to the edges of the notebook.
*Quick tip: To avoid getting glue on your pages, agree the cover abroad from the rest of the notebook while yous coat the edges with glue. Smooth everything with your sponge brush.
If your decorative paper is a lite color, or if it'south not very thick, you'll demand a white layer to hide the marble blueprint (see Step 2). Otherwise, y'all can skip the white paper and swoop straight in with your decorative paper.
Stride ii:While your glue is nevertheless wet, apply a sheet of white printer paper to the front end of your notebook. Outset at the spine and shine outward, paying special attention to the edges. Give everything a good once over to brand certain you have a smooth awarding with no air bubbles. Every inch of the paper should be firmly adhered to avoid problems afterwards on. Echo on the dorsum cover and allow everything to dry for at least 2 hoursbefore moving on.
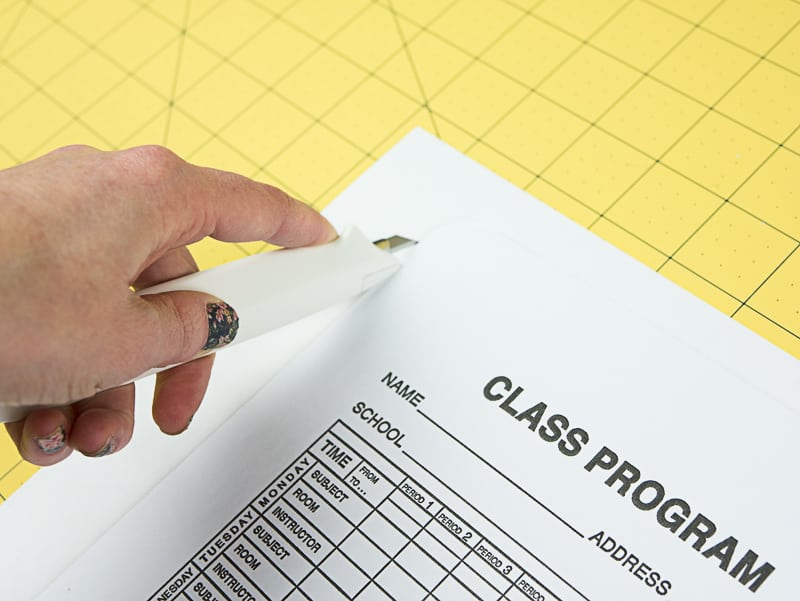
Stride 3: Using a craft pocketknife, trim around the front cover of the notebook to remove the excess newspaper. I wanted a very clean edge, so I trimmed right up next to the cover. Repeat on the back cover. Now you should have a white composition notebook with clean, trimmed edges.
Footstep iv:We're ready for our next layer of glue. Just like you lot did in Stride 1, apply a thin, even layer of Mod Podge over the white newspaper layer. Work quickly so your mucilage doesn't dry up before you're finished applying it. Retrieve to smooth it with your sponge brush. Smooth, smoothen!
Finally, information technology'southward time for the star of the evidence! I bought a couple rolls of Rifle Paper Co. souvenir wrap a while back, and information technology's and then pretty I tin can barely bring myself to wrap gifts in it! Forth with these pretty peach flowers, I as well snagged a few other patterns. That mode, I can make a consummate set of notebooks in different patterns and still have some left for–Oh, I don't know–really wrapping gifts? 😉
*Quick Tip: If you're using gift wrap, yous'll need to cut your newspaper downward to a size yous can work with. I used my Fiskars paper trimmer to get a squeamish even cut.
Pace five: While your glue is still wet (I know I've already said it, but information technology'due southactually of importthat your glue is thin, fifty-fifty, and wet. Otherwise, your paper won't adhere properly), apply your decorative paper sheet, starting at the spine and working your manner outward. Since you just did this in Step ii, you're already an practiced newspaper smoother. Await at yous become! Once your pretty paper is safely practical to both sides of the notebook, let the whole thing set up for 2 hours.
*Quick Tip: If yous notice your notebook warping while it dries, you tin place a heavy book on it to coax it back into shape.
Pace half-dozen:Once everything is squeamish and dry, go effectually the edges again with your craft knife to remove the excess paper.
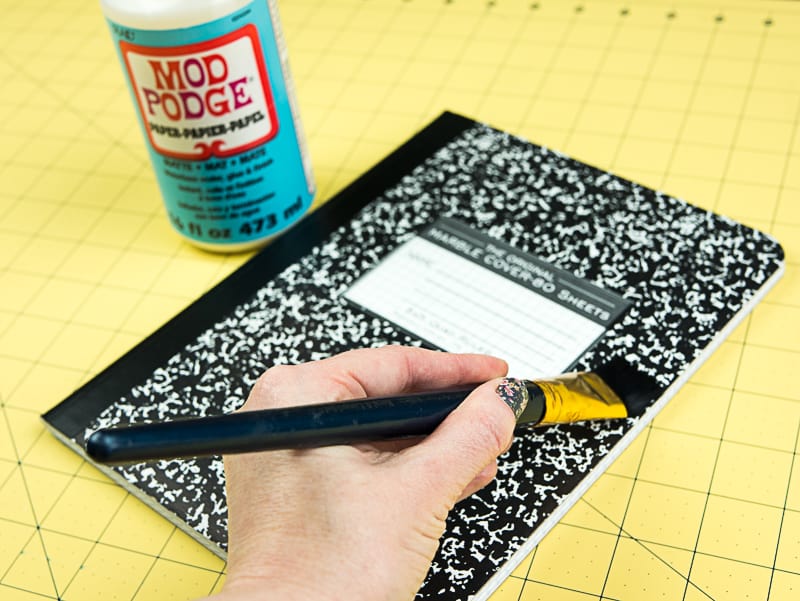
Step seven (optional):Coat the whole notebook with one more layer of Mod Podge to seal everything. Pay special attention to the edges since that's where yous're most likely to become lifting.
**This was an essential step for me since I tend to be pretty rough on notebooks. Having an extra layer of Mod Podge gives it a little more than durability against gluey-fingered kids and coffee spills. I was really happy with the terminate I got from the Mod Podge newspaper formula considering it wasn't shiny or viscid.
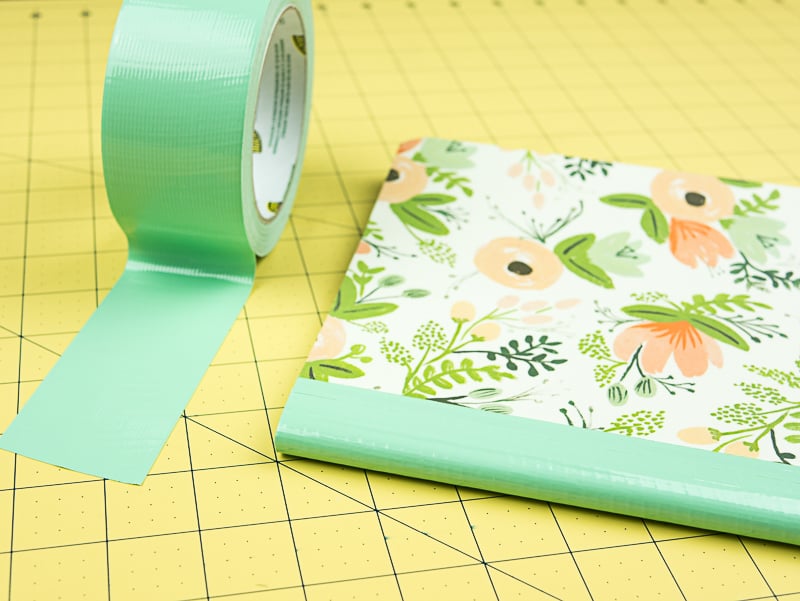
Footstep vii:Now that your notebook is covered, let'south take intendance of the spine. I got glue all over the spine while I was working. Seriously, yous would think I was working with a mop! Anyhow, you can comprehend the spine with colored duct tape that matches your paper. It may take more than than one strip to cover the entire spine. Smooth any air bubbles and trim the tiptop and lesser edges with your scissors.
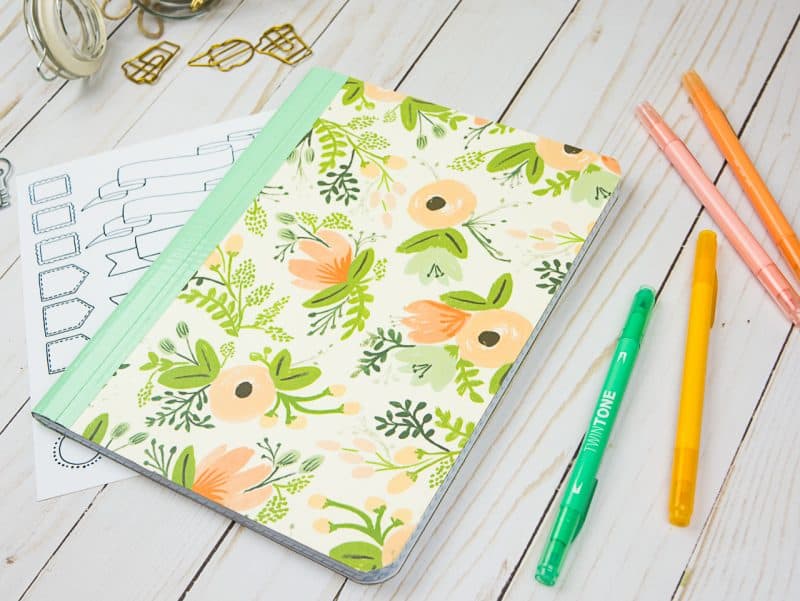
Voila! A beautiful DIY journal that's set for all your big ideas. Grid-lined notebooks are great for Bullet Journaling, planning, travel journaling, and even doodling. Plus, these make great gifts for teachers, writers, and budding entrepreneurs.
I f y'all're more of a visual learner, here is the total video tutorial:
Requite this a shot, so experiment with other materials. Brand sure y'all share your projects and tag me on social media (@pageflutter) so I can come across your beautiful creations. Happy journaling!
Those are my ideas, but I want to hear yours! What materials would you use to cover your own DIY journal or stash of notebooks?
Brainstorm with me!
Subscribe to my newsletter for Page Flutter updates, posts, and announcements.
Don't worry, I only deliver the good stuff. No spam.
Facebook // Twitter// Instagram // Pinterest

Writer & Artistic Blogger
Megan Rutell is the blogger backside Page Flutter. She's also a author, stationery lover, Air Force veteran, and homesick Colorado girl.

How To Add Journal With One Book Elastic,
Source: https://pageflutter.com/composition-notebook-diy-journal/
Posted by: kimballcang1972.blogspot.com
0 Response to "How To Add Journal With One Book Elastic"
Post a Comment